The beer-making process has always been described as combining art and science.
The method has a precise and calculated quality to it.
Beer brewing steps are just that…steps.
Still, the “rules” and potential constraints can be hazy, allowing for personal interpretation and creating a unique beer.
While it might seem intimidating, brewing beer isn’t as complex as you imagine.
Brewing beer is fundamentally a simple process with roots dating back 12,000 years.
Heat water and grain (or extract from grain), then boil the combination with hops, cool it, ferment it with yeast, and carbonate it.
Of course, that’s the simplified version, but those steps never change.
So, now we’ll go through each procedure phase in greater detail.
We’ll begin with the ingredients you’ll need and the different sorts of beer you can make.
Let’s get started!
The Ingredients
To start your brewing journey, you’ll need to gather your ingredients.
Though the amounts vary depending on the style, beer is prepared from water, grains, yeast, and hops.
Water
Since beer comprises up to 95% water, water quality is critical.
Water can have various levels of mineral concentration depending on its source.
This can have a hefty impact on the flavor of the beer.
Changing the mineral content of a region’s water used to be impossible.
This gave the water a massive influence over the beer styles that could be prepared in the area.
That’s why there are so many beer styles!
For instance, Stout is linked with Dublin, Ireland, because untreated water was only appropriate for dark beer brewing at the time.
English-style pale ales, made famous in Burton-on-Trent, England, attribute their distinct hop bite to the region’s high sulfate concentration.
In contrast, the high carbonate concentration of the water in southern Germany (Bavaria) required beers to be darker and relatively low in hop bitterness.
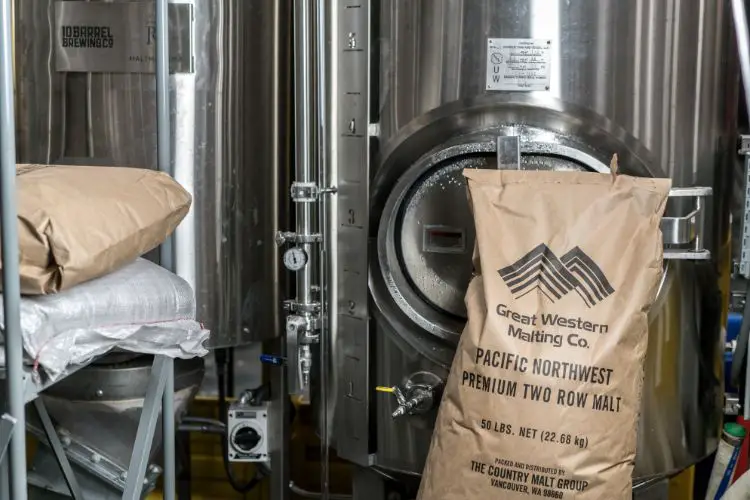
Grains
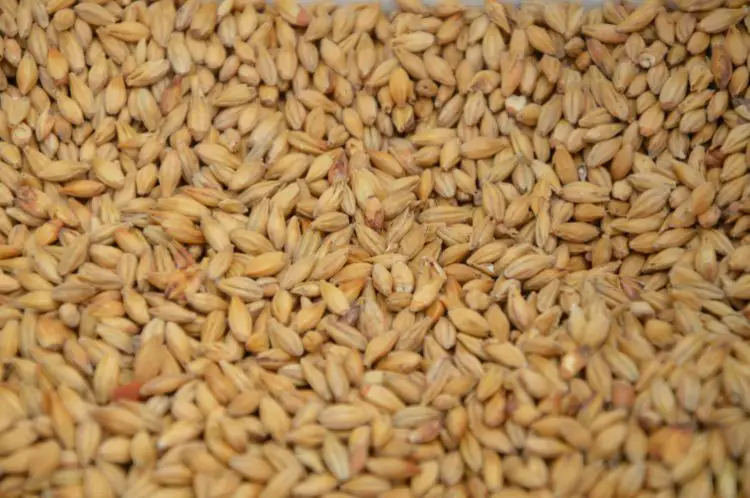
The grains I’m talking about here are the same as those used in morning cereals.
WThere’sheat, rice, barley, oats, corn, rye, etc.
Before wheat and malted barley can be used to make beer, they must first be malted (the others do not).
The malting process mimics grain germination, which metabolizes the natural grain sugars (maltose).
These are then fed to the yeast during the fermentation process.
To do so, immerse the seed in water until the plant sprouts.
Dry it in a kiln just as it emerges from the seed.
The drying process can determine the different malt colors and flavors.
It is the grain that will give your beer three essential qualities, which are:
Color
The type of malt used determines the beer’s color.
Because particular molecules called enzymes transform malt starch into sugar, all beers contain a high proportion of light-colored malts.
Fermentable Component
It will serve as “yeast nourishment.”
Malt sugars provide all the fuel yeast eats and convert to alcohol and CO2.
Aroma and Flavor
These flavors range from mildly corn-like to burnt and mocha-like, with numerous variations.
Yeast
Yeast is the third most critical component of the beer brewing process.
Throughout fermentation, yeast consumes the sugars from the malted grain and excretes ethyl alcohol and carbon dioxide.
Brewing yeast is classified into two types: ale yeast and lager yeast.
Within each of these groups, there are hundreds of distinct yeast strains.
Certain strains are more suited to producing certain types of beer.
Most brewers believe that the yeast chosen is an essential factor in determining the quality of their beer.
Most yeasts, including ale yeasts, have a more neutral flavor than yeast strains that produce Bavarian-style wheat beers.
Lager yeasts are the most balanced of all strains, creating minimal byproducts of fermentation, enabling the malt and hop taste of the beer to shine.
Hops
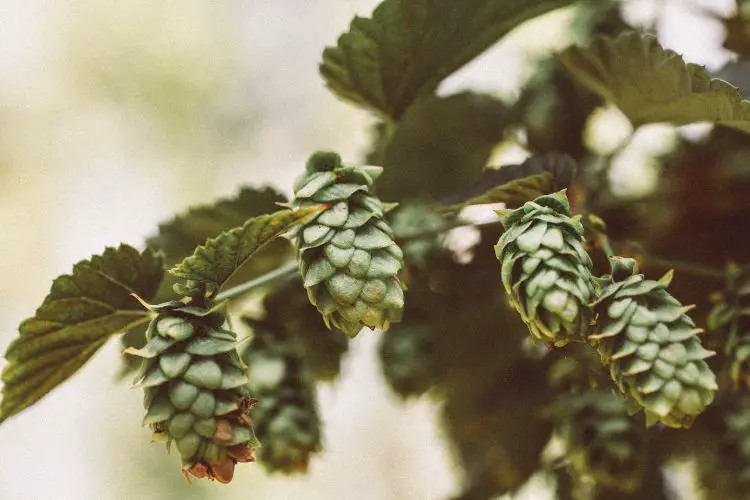
Hops lend the beer a robust aroma, a range of flavors, and a gentle-to-strong bitterness that balances the malt’s sweetness.
They are the blossoms of a perennial vine that resemble soft, green pine cones and contain lupulin, a yellow powder.
The resins and oils in this powder are essential for beer production.
The bitterness of beer is provided by a hop compound known as alpha acid.
Certain beer varieties, such as pale ales, get their flowery, citrusy, and hoppy smells from the oils.
When hops are heated, various chemical changes occur, allowing the alpha acid to bitter the beer.
The shorter the hops are cooked, the less bitter the beer.
There are several hop types, just as there are usually numerous vegetable varieties.
Each type has its distinct flavor and scent.
There you have it, all the ingredients you need to source.
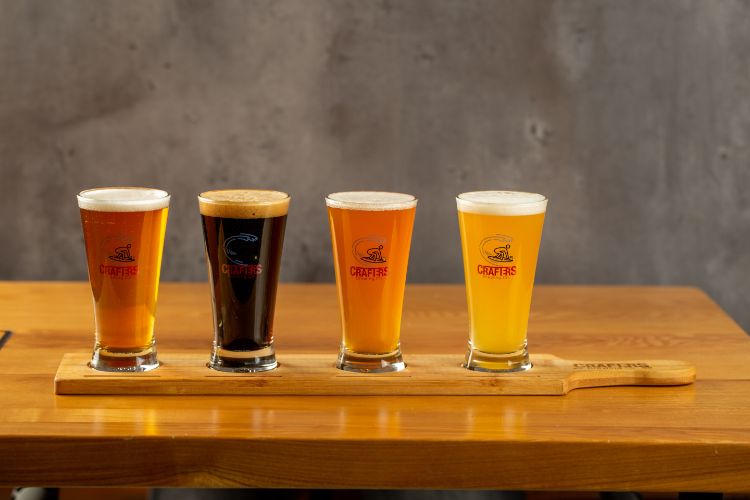
These four simple components can be converted into a one-of-a-kind work of brewing art by a talented brewmaster.
There are hundreds of beer types, thousands of modern breweries, and thousands of beers made from these four components.
The constant influx of new brewers is driving beer inventiveness to new heights.
Flavor variations are unlimited when other ingredients like spices or fruits are added.
The Types of Beer You Can Brew
Top Fermenting
The yeast involved in the creation of ale ferments throughout the beer and accumulates at the top.
Compared to lager yeast, it has a more robust tolerance to alcohol and ferments at warmer temperatures.
Top-fermenting ales include IPAs, stouts, and wheat beers.
Bottom Fermenting
The yeast used in lager production is more delicate than in ale production.
It sinks to the bottom of the liquid vessel after fermentation.
It must ferment more slowly and at lower temperatures than ale yeast, and it has a lesser tolerance to alcohol.
Bottom-fermenting lagers include Pilsners and Bocks.
Spontaneous Fermenting
Lambics and sour beers are created by a process known as spontaneous fermentation.
This sort of fermentation happens when beer is introduced to wild bacteria and yeast.
These beers emerged from Belgium, but brewers worldwide have discovered methods to tweak the process to make their own sour, quirky brews.
Beers fermented spontaneously include the American sour, Belgian gueuze, and Flanders red ale.
What Goes Into Brewing Beer?
Brewing beer involves:
- Sanitizing
- Malting
- Milling
- Mashing
- Extract separation
- Hop addition
- Boiling
- Precipitate removal
- Cooling and aeration
- Fermentation
- Yeast separation
- Aging and maturing
- Packaging
That seems like a lot, so we’ll break it down in this section.
The goal of the whole process is to transform grain starches into sugar.
Then, you’ll extract the sugar with water and ferment it with yeast to create the alcoholic, softly carbonated beverage.
Brewing requires a great deal of science and patience.
Varying hops are used for bitterness and aroma, and numerous malts exist.
The temperature you brew affects the flavor, as does the water used.
You can also add additional hops, botanicals, or flavorings.
Step 1: Cleaning and Sanitizing
The first stage isn’t brewing if you already have all the essential equipment.
To begin, you must properly clean and sanitize ALL of your equipment.
This is a critical stage. There shouldn’t be any shortcuts here.
Everything that will come in touch with your beer throughout the brewing process should be thoroughly washed with an unscented mild detergent.
They must be sanitized with a “sanitation-grade” solution.
Utilizing no-rinse kinds is ideal because they make the process more accessible while still being effective.
It’s time to finally start brewing after you’ve thoroughly cleaned and sterilized your equipment.
Step 2: Choose Your Type of Brew
The brewing stage necessitates your time and complete focus for a lengthy period.
This is attributed to the necessity of sticking to a fixed timeframe and continuously monitoring the brewing process as it progresses.
This stage comprises several sub-processes, including mashing, lautering, and boiling, all of which are crucial.
Making every effort to do things right during this period is essential to the overall quality of your product.
These crucial brewing processes will serve as the foundation for your beer creation.
If you make a mistake, it will indeed impact you later.
It’s common to blunder the first few times you learn to brew beer at home.
Do not be discouraged or intimidated by this.
You must recognize that this is all part of the learning process and that everyone will make errors.
Take notes, acknowledge your missteps, and use them as learning opportunities!
Your Main Brewing Methods
Brewing can be done in three ways: extract, partial mash, and all-grain.
As the name implies, the processes differ primarily in how the beer’s foundation is formed, among other things.
Extract Brewing
Extract brewing essentially utilizes grain extracts, whether dry or liquid or a combination of both, to create the beer’s foundation, known as “wort.”
This method may also incorporate small amounts of grain to provide depth to the beer.
Overall, this procedure needs less equipment, space, and time, making it ideal for rookie and experienced homebrewers.
Even as they learn and advance, some brewers use extract brewing methods for convenience.
Partial Mash Brewing
In partial mash brewing, sometimes called “mini-mash,” malt extract and grain are typically utilized.
The mix of the two expands your options for creating your beer’s flavor, body, appearance, and overall quality.
This refined brew is best for folks who have successfully brewed using extract-only approaches.
It would be best if you had a firm grasp of the process and wanted to take things to the next level.
At the same time, it takes only a bit more time, equipment, and space than extract-only brewing, making the switch simple.
All-Grain Brewing
All-grain brewing is your final option.
This is the purest way of producing beer, but it necessitates more equipment and space (and thus a more significant financial commitment).
You’ll also have to devote more time and thoroughly understand the brewing process.
Because all-grain brewing does not use malt extracts, all sugars are extracted solely from the grains, giving you complete control over your brew.
As a result, there may be additional potential for errors to occur.
All-grain brewing is only for the expert brewer who understands the homebrewing process thoroughly.
Step 3: Mashing

The next phase in the beer-making process is mashing, which involves transferring the grist, or milled malt, to the mash mixing vessel.
The mashing process involves blending grain and water, sometimes known as liquor, and heating it to temperatures ranging from 100 to 170 degrees Fahrenheit.
Mashing causes the malt’s inherent enzymes to break down starches, turning them into sugars and alcohol.
This procedure takes between one to two hours.
Mash temperatures can be steadily increased or let to rest at specific temperatures, both of which are essential decisions in the brewing process.
Different temperatures activate different enzymes and influence protein and fermentable sugar release.
Proteins also play a limited function but are essential in forming foam in the finished beer.
Most brewers utilize steam to heat their vessels.
The Difference Between Infusion and Decoction Mashing
Water and grain are blended in one of two ways: infusion or decoction.
Infusion mashing involves heating the grains in a single vessel (the mash tun).
Decoction mashing involves transferring a portion of the mash from the mash tun and boiling it in a separate vessel (the mash kettle), then returning it to the original mash.
Some brewers will repeat this process to obtain double decoction, and a few will go through triple decoction.
Again, the wort is the resulting liquid of sugars and water during mashing.
Malt has already been processed into a concentrated syrup or powder of milled grain for extract brewing.
Blend this with warm water to form the wort.
Homebrewers commonly use this method to avoid the extra steps required for removing spent grain from the wort.
Step 4: Lautering (Separating The Wort)
Lautering is the procedure of removing wort as efficiently as possible from spent grain.
Typically, it is done in a separate lauter tun.
However, both large and small-scale brewers may now do mash filtration.
Your lautering tun should have a perforated or slotted bottom.
The mash solids settle to the bottom and act as a filter for the wort.
Overall, lautering is a three-step process that includes mashout, recirculation, and sparging.
The mashout involves increasing the mash temperature to 170 degrees Fahrenheit.
This inhibits enzymatic processes and retains the wort’s fermentable sugar profile while making the wort less dense and more straightforward.
The wort is then pulled from the bottom of the lauter tun and recirculated.
This allows the loose grain particulates to be naturally filtered out by the grain bed and increases wort clarity.
After the wort has been moved, the spent grain, which consists of grain husks and particles left over from the mashing, must be sparged.
Sparging is rinsing spent grain with warm water to extract as many sugars from the remaining grain for the wort.
The discarded grain is usually recycled as hog or cattle feed.
It can also be used for baking bread!
Step 5: Boiling and Adding Hops
Following the separation, the wort is transported to a vessel known as the kettle or copper for the boiling process.
This step is required to stop enzyme activity and extract the bitterness value of adding hops.
Many hop (Humulus lupulus) types can be chosen for the bitter and aromatic attributes they contribute to brewing.
Female flowers, or cones, develop small glands that carry valuable brewing flavorings.
The chemical compounds removed during wort boiling are known as humulones.
A percentage of these (the a-acids) is isomerized by heat to generate the related iso-α-acids.
This is what gives beer its characteristic bitter flavor.
Originally, dried hop cones were put intact to the boiling wort, but powdered compressed hops are widely utilized because they extract more efficiently.
Moreover, hop components can be removed using solvents such as liquid carbon dioxide and added to the wort or, following isomerization, to the resulting beer.
Step 6: Whirlpooling
After a rolling boil, the swirling phase purifies the wort further by eliminating protein and hop particles by settling.
These solids are referred to as trub.
Although the boiling kettle can be used as a whirlpool, many brewers prefer a separate, specifically built container.
A hop back is a whirlpooling vessel that uses fresh hop flowers or cones in a sealed chamber to filter the trub.
You can use this to add extra hop aroma compounds to the wort.
Let’s say you want to use whole hop cones in the boil; you’ll need a hop back.
On the other hand, a traditional whirlpool is more effective in collecting trub produced by hop pellets.
A heat exchanger is utilized to cool the wort to the temperature required for fermentation.
Brewers frequently employ the warm water from this exchange to begin a new brewing cycle.
Step 7: Activating and Pitching The Yeast
After taking your gravity reading, it’s time to add the yeast.
This is referred to as “pitching” in the brewing industry.
Before starting the brew, you want to ensure your yeast is ready for pitching.
Ensuring yeast health is extremely important to consider before starting the brew.
Allow your yeast to rest at room temperature for about 3 hours before pitching to ensure it is ready.
This will result in better fermentation and, as a result, superior beer.
Brewing Yeasts, You Can Use
Brewing yeast (not to be confused with baking yeast) is available in dry and liquid forms.
Each has its advantages over the other.
Either variety is used at the brewer’s discretion.
But regardless of which type you use, ensure your yeast is ready for pitching.
Dry Yeast
Dry yeast, commonly found in ingredient kits, does not need to be activated but should be kept at room temperature.
Liquid Yeast
Before itching, liquid yeast must be activated by rigorously shaking the container and making a yeast starter.
A yeast starter will prime the yeast for fermentation by allowing it to increase.
When your yeast is ready, pitch it into the fermentation tank and aerate the mixture by rapidly stirring with a sterilized spoon or securing the cover and shaking the pot.
Aerating the mixture is vital because it reintroduces oxygen into the wort previously removed during the boil.
Oxygen is required for yeast growth, which will eventually finish the fermentation process.
At this point, the yeast has been incorporated, and the mixture has been properly aerated.
Now, secure an airtight lid to the vessel and insert a sterilized airlock or similar blow-off valve.
This will allow CO2 gases to exit while inhibiting outside air from entering.
Step 8: Fermentation
After the wort has cooled, it is transferred to a fermentation vessel, and yeast is added.
It’s here that the magic happens.
The yeast consumes the sugar, resulting in the production of carbon dioxide and alcohol.
You can add more hops, botanicals, or flavorings to make the beer you want.
The type of beer determines the time it will take for the beer to ferment.
Most ales are held at colder temperatures for a short time after brewing.
If lager is your choice of brew, keep the beer at lower temperatures after fermentation for longer.
Keeping the right temperature during this step is critical for the beer’s flavor, and it’s one of the most challenging tasks for home brewers.
The suggestion is to divide fermentation into two stages: primary and secondary.
Primary Fermentation
The fundamental goal of primary fermentation is for the yeast to convert the carbohydrates into alcohol and CO2.
Undesired particles will drop to the bottom of the tank, separating them from the beer.
Dead yeast cells, extraneous proteins, and hops make up “trub,” a collection of these particles.
Depending on the style of beer you’re creating, this process will take about a week.
Respiration must occur before active primary fermentation can commence after adding the yeast to the mixture; this takes about 12 hours.
For optimal fermentation, keep the temperature between 68 and 72 degrees Fahrenheit.
You’ll detect a discharge of CO2 gas from the vessel after vigorous fermentation has begun.
You will see bubbling within the airlock chamber while employing an airlock.
This indicates the successful conversion of the fermentable sugars by the remaining yeast.
When bubbling becomes less frequent, it’s a sign that primary fermentation is nearing its end.
You’ll have to move the beer to another fermentation vessel.
Secondary Fermentation
Although the more active fermentation stage has already occurred during primary fermentation, stable and active yeast cells are left.
Transferring your beer to a secondary fermenter and allowing it to condition will allow the surviving yeast to convert the more complex sugars.
This improves the quality of your beer by boosting clarity, smoothing out the flavor profile, and lowering the danger of infection and off-tasting flavors.
Brewers often choose to “dry hop” their beer during the secondary fermentation stage.
Dry hopping is the method that adds flavor and aroma to your beer by physically infusing it with hops.
Dry hopping is style-dependent (particularly for IPAs and other hoppy beers).
Secondary fermentation is an appropriate time to dry hops because the intense fermentation and rapid CO2 release have already occurred, enabling the hops’ oil and aroma to settle in gently.
The secondary fermentation phase should take at least one week to finish, although you can certainly extend it if necessary.
Should You Always Go Through Secondary Fermentation?
Nope. Secondary fermentation isn’t required, although it has a lot of advantages when making beer at home.
At this point, it clears up even more and becomes more refined.
However, if done incorrectly, it can bring infection and other elements that can negatively impact your brew.
Secondary fermentation, when done correctly, produces a product that is both better looking and better tasting.
Let the beer ferment for 2-3 weeks in the primary fermenter if you don’t want to do a secondary fermentation.
Step 9: Carbonation and Packaging
After fermentation, the beer must be kegged or bottled and carbonated, either naturally or artificially.
Forced carbonation injects CO2 into a container at high pressure, causing it to soak into the beer.
Most breweries use forced carbonation since it is a much speedier procedure that results in more clarity in bottled beer.
Krausening is the traditional technique for introducing carbon dioxide during the fermentation process.
Bottle conditioning, or adding a little sugar to the bottle during bottling, is another way to get carbonation.
When a cask-conditioned real ale is first introduced to the cask, sugar, yeast, and hops are added to carbonate the beer.
Beer Brewing FAQs
If things seem funky to you, something is most likely wrong. However, if this is your first batch, don’t panic.
Complete the directions with your beer-making kit and then taste the resulting beer. Is it still drinkable?
If that’s the case, you’re in good condition. If this is not the case, something went wrong. It could be an infection or any number of other problems.
Even if you find a possible infection, use it as a learning opportunity; your next batch will undoubtedly b.
Certainly not. You may brew beer by simply sprinkling yeast on the wort. It works perfectly and is quite simple.
Is this, however, the optimum method for pitching dry yeast? That is a point of contention.
Before pitching, many experts agree that yeast should be rehydrated in a small amount of water.
Their logic is sound, but if in doubt, read the yeast packet instructions or go to the manufacturer’s website for more information.
This is by far the most common issue that home brewers encounter.
Fermenters don’t permanently seal effectively; the airlock won’t bubble if they don’t, and aging seals frequently cause leaks.
Take a hydrometer reading or hunt for visible clues of what’s going on to assess the situation appropriately.
If the brew is still fermenting, close it as tightly as possible and replace the lid, seal, and grommet before brewing again.
If it’s ready, bottle it right away.
Don’t toss it out; it might not be bad at all.
The airlock’s purpose is to keep insects and air out while allowing CO2 to escape; it is not intended to serve as a carbonation process.
Carbonation is achieved by giving the yeast a modest amount of extra priming sugar to eat when bottling beer.
The yeast will devour the sugar and produce CO2 after capping.
But because the bottle is sealed, the carbonation will have nowhere to go but into the beer’s solution.
The yeast must have optimum conditions for their function, including a temperature range that is warm enough for them to work.
This usually is around 70 degrees Fahrenheit.
During this phase, if the beer is placed in a chilly basement or refrigerator, the yeast will either not carbonate the beer or will do so incredibly slowly.
Place the bottles in a warmer environment and wait a bit more.
Only in exceptions with further steps to carbonate your beer.
Final Thoughts
There you have it, the general beer brewing steps needed to get going.
As you can tell, brewing beer is a pretty involving process that’ll take some trial and error.
Be ready to learn a lot along the way!
But as you learn to perfect your craft, homebrewing can be highly satisfying.
You will work on your brew, so feel free to get creative.
Experimentation is the soul of the brewing process, and any facet of brewing, from ingredients to temperatures to timing, can be altered.
That’s why there are so many beer styles out there.
Good luck in creating your favorite alcoholic beverage, cheers!