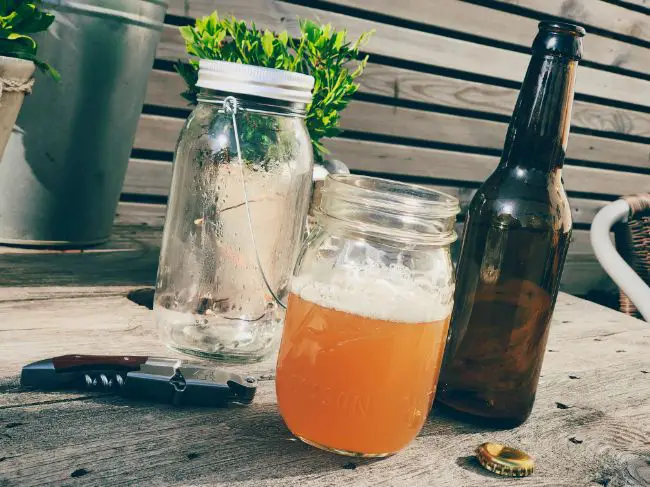
Is it possible to brew beer at home without a kit?
Yes!
People were enjoying fermented beverages some 12,000 years ago.
They sure didn’t have the brewing kits that are available these days.
In this post, I will teach you how to brew beer at home without a kit.
We’ll review what you need and how to go about the process.
The Supplies You’ll Need
All your homebrewing equipment shouldn’t cost you more than $50.
However, that might not include the price of bottles and advanced equipment.
I suggest being a savvy homebrewer and hunting for the best deals you can get your hands on.
You might even have some of this stuff lying around the house!
So, what would be the difference if you didn’t get one of those kits that provide you with the necessities to brew a small batch of beer?
The volume of the batch is the main distinction between utilizing a homebrewing kit and coming up with your own.
Since homebrewing takes a lot of time, most brewers produce about 20 L of beer at a time.
The typical batch size for homebrewing kits is less than 10 L, barely enough for sharing.
Beyond an airlock and an auto-siphon, you probably don’t need any special equipment if you only want to experiment with a tiny volume of beer—say, 5 L.
The equipment needed to make beer at home is listed below.
If you have these, you’re set to make hard cider, wine, or beer.
Try the beer in a bag too.
Sanitation Chemicals
Your equipment’s cleanliness will be critical to your brew’s outcome.
After the beer has been boiled, everything that comes in contact with it needs to be cleaned.
So, sanitize, sanitize, sanitize!
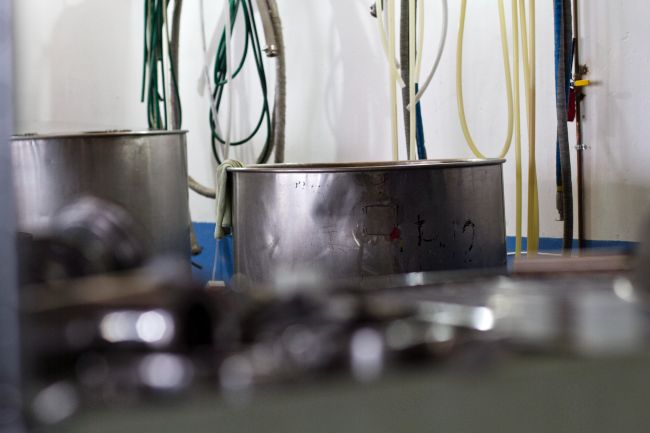
Boiling Pot
Naturally, this vessel will dictate the amount of beer you can brew at a time.
If you want to brew 20 L of beer, you’ll need a 22 L pot.
If you have a canner in your kitchen, you can tick this off your list.
Airlocks and Carboys
If you are serious about creating alcoholic beverages, airlocks are crucial.
The good news is they’re reasonably priced at around $2 each.
The CO2 can escape through an airlock while the surrounding area remains sterile.
I advise getting these since cylindrical airlocks are more straightforward to maintain than S-shaped airlocks.
Simply check that the lip of your fermentation container can accommodate your airlock with a tight fit.
If you’re only interested in making large batches of beer, you might want to get a carboy instead.
Tubes and Siphons
A siphon you can use for food can transfer liquid between carboys.
They are helpful for both bottling and sediment filtration.
An auto-siphon is a good investment because it’s simple to use and only costs around $25.
Advanced Supplies
The following supplies are helpful if you intend to make a lot of beer or already know what you’re doing.
However, you can skip these items if you’re giving it your first shot.
Hydrometer
A hydrometer shows the quantity of sugar in your beer before and after fermentation. This is to estimate the amount of alcohol in your beer.
The drop in sugar levels implies the presence of alcohol.
Wort Chiller
The risk of contamination rises if you are brewing a higher volume of beer because it can take SO LONG to cool down.
Therefore, cooling your wort down as soon as possible is crucial.
You can pass cold water through a copper pipe buried in the proto-beer pot.
You can do so with a copper wort chiller connected to your sink.
Mash Tun
You’ll need a mash tun for wholegrain brewing.
To activate the enzymes that will transform the starches into simple sugars, you have to keep your grain heated for 60-90 minutes.
You don’t need to buy this item.
You can attach a fixture to the bottom of the cooler instead.
The Ingredients You’ll Need
Water
As you might have guessed, beer is mostly water.
Avoid bad-tasting tap water, even though you don’t need to use distilled water.
I don’t advise using bottled water for fermenting unless tap water is hazardous.
In actuality, a majority of bottled water is merely municipal tap water.
The question would be, which is the best water for brewing beer?
To get your water ready for brewing, dechlorinate it.
Malted Grain or Malt Extract
When yeast consumes grain sugars, that’s when the magic happens.
Grain contains a lot of complex carbs in its unprocessed state.
It must be malted to transform into simple sugars that the yeast can consume.
Malt can be obtained for homebrewing: malted grain and malt extract.
Malted Grain
Malted barley is typically used to make beer because it naturally contains a large amount of starch.
It also contains the enzymes and proteins to feed the yeast and the starch-to-sugar conversion “machinery.”
Barley husks are also ideal for filtering the wort. Wheat, corn, rye, and oats can also make beer.
The steps in the process of malting grain are as follows:
1. Let a rootlet the same size as the original grain grow by sprouting the grain.
2. By this time, the grain has activated the enzymes needed to transform the storage starches into simple sugars.
3. Heat the grains to keep them from growing any further.
4. Dry the grains and toast them for optimal flavor.
Malt Extract
People use malt extract to eliminate the need to separate the wort from the malted grains.
It is available in two forms: dry malt extract and liquid malt extract.
Before buying your malt extract, I suggest checking your recipe and what specific type of extract it calls for.
I emphasize this because they are not easily interchangeable.
Commercial malt extracts are more convenient to use than homemade.
However, your finished beer will probably have that homemade beer taste.
Simply put, it’s inferior to creating your wort.
The problem is making enough wort at home can be pretty tricky.
You’ll have to hit the right malt concentration for a black beer.
Therefore, combining malt extract with malted grain is a simpler and tastier option.
Yeast
Historically, only wild yeasts were used to produce alcohol.
However, its regional variations and people’s capacity to produce them dictate the quality of its resulting beer.
Plus, wild yeasts don’t work well with stronger beverages because they tend to lose potency at 5% ABV.
Of course, people have made brewing advancements over the years.
To produce beer, wine, and other beverages, yeast strains have been bred over time.
Each strain has been chosen to ferment at a specific temperature and will affect how your beer tastes.
Hops
The cone-shaped blossoms on a hop vine are known as hops used in beer.
They serve as a preservative and flavoring.
They can also be added at various points while the beer is brewed for different effects.
If you add hops while the beer is boiling, it’ll add a distinct bitterness.
If you add it during the secondary fermentation process, it’ll add a pleasant vegetable taste.
There are numerous types of hops, each giving the beer a distinct taste.
They are available as pellets online or at your neighborhood brew store.
Sugars
There are two main reasons why sugars are added to beer:
- To increase the beer’s alcohol content without adding more wort
Extra wort would result in a dark beer (stout) with more alcohol since wort provides the beer with the sugar it needs to produce alcohol.
You must add sugar if you want a light beer with a higher alcohol percentage.
- To finish the brewing process by adding carbonation to the beverage
The beer’s flavor will vary depending on the type of sugar used.
For example, maple syrup and honey will taste different.
I recommend using dextrose if you want a pure brew without added flavoring.
It’s inexpensive and doesn’t alter the taste of beer at all.
Irish Moss
Irish moss is a seaweed that can be purchased dry or powdered.
For the final 20 minutes of boiling, the moss is added to help the beer get clearer.
It makes the wort’s proteins cluster up and sink to the bottom of the boiling kettle, where they can be filtered away.
Flavorings (Extra Ingredient)
You can flavor your worst as it’s being boiled.
You can only do so at this step to minimize the chance that they will infect the beer with unwelcome yeasts and germs.
What sorts of things can you add, you ask?
Go wild!
You can try different spices, dried fruit, vanilla beans, coffee, and cocoa nibs.
You can also add flavors when you transition your beer to the secondary fermentation process.
To prevent contamination, wash any additives during this phase.
Although there is a risk, in most cases, the alcohol content will be high enough to prevent beer contamination.
Brighter flavors like berries, fresh fruit, and herbs work best with secondary fermentation.
Cloudy homemade beer? Check out this article.
How To Brew Beer At Home Without A Kit: The Step-by-step Process
Now that you have everything you need let’s get down to making your homebrew!
1. Sanitize.
It is always prudent to begin the beer-making process by sanitizing.
The last thing you want is to produce beer that tastes like dishwater.
2. Prepare the wort.
You can simplify the brewing process if you’re only malt extract.
Skip this step, add the malt extract to the boiling pot, and continue from there.
If you’re up for the challenge, I suggest putting effort into preparing your wort because wholegrain beer is just on another level.
Alternatively, you can make an all-grain beer using a combination of whole grains and malt extract, which is typically less expensive.
The wort needs to be prepared in two steps:
- Heat the mash.
The malted grain should be submerged at approximately 150°F (67°C) for 60 minutes, depending on the recipe.
As a result, the complex storage starches in the grains are activated by the enzymes.
These starches are then converted into simple sugars that the yeast will consume.
- Sparge.
The technique of thoroughly rinsing the malted grain to remove all of the wort is known as sparging.
It’s time to drain the wort once the mash has been allowed to rest for 60 minutes.
Drain all the wort into your boiling pot by opening the valve at the bottom of the mash tank.
Depending on your recipe and how much water you’ve previously used, heat the sparging water to 170F/77C.
As you continue to drain the wort into the boiling kettle, pour the hot water through the mash tun.
3. Boil.
Heat the wort until it boils, then continue for 90 minutes.
As the recipe directs, hops and Irish moss can be added to the boiling liquid.
Hops aid in flavor development and are typically added multiple times throughout the boil.
Tip: While some people add the hops to their boiling pot, try using a mesh bag so that you won’t need to filter it out afterward.
4. Chill.
Probably the most challenging step in making beer is chilling the wort.
After boiling the wort, it must be cooled to about 70°F (21°C) before the yeast is added.
Avoid adding the yeast early since you might ruin the brew.
Additionally, it’s critical to rapidly freeze the wort (a few hours) to stop wild yeasts and bacteria from invading your beer and converting it into something unpleasant.
The wort can be cooled in two ways:
- Use a wort chiller.
- Carefully place the boiling pot in an ice-filled bathtub.
5. Pitch the yeast.
If you want to know the final ABV, remove some of the wort after it has cooled.
Then, use a hydrometer to determine its original gravity.
Before pitching the yeast, sterilize the yeast package, the mixing spoon, and EVERYTHING ELSE that will touch the brew in the future!
The cool wort will then receive the yeast.
Please give it a good mix.
The objective is to introduce some oxygen for the yeast into the wort.
6. Ferment.
Transfer the beer into carboys using an auto-siphon from the boiling pot.
Since the beer will bubble extensively throughout fermentation, leave plenty of headroom in your carboys.
The carboys should be sealed with airlocks and kept somewhere dark and reasonably cool (67F / 19C) for 10 to 14 days.
Please refer to the instructions on your packaging for the precise temperature range and time requirements for your yeast.
7. Dry hop.
If your specific recipe specifies dry hopping, hops must be added to the beer after primary fermentation is complete.
The final infusion of hops serves as a preservative and flavor enhancer.
It will produce a tasty, hopped beer.
Rack the beer into a fresh carboy to dry hop.
Add the hops, then airlock-cap the container.
Give it a week or two more to sit so the hops can dissolve and settle to the bottom.
8. Carbonate.
After 2-4 weeks in the carboy, the beer is done.
The yeast will then finish consuming all of the sugars.
The beer will be flat, though.
Before bottling, more sugar is added to the beer to carbonate it.
This will carbonate the beer bottles and provide food for the surviving yeasts.
The residual sludge in the bottom of the carboys should be left behind before racking the beer back into a sterile boiling pot.
Before bottling, combine dextrose with the entire batch of beer.
This guarantees that the dextrose is incorporated evenly.
You can use your hydrometer again to determine the final ABV at this phase.
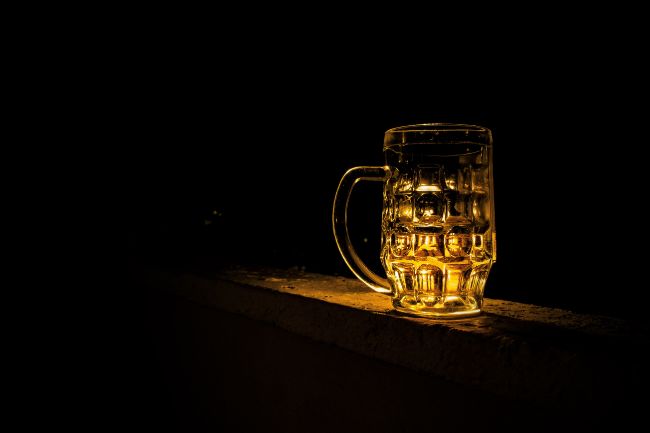
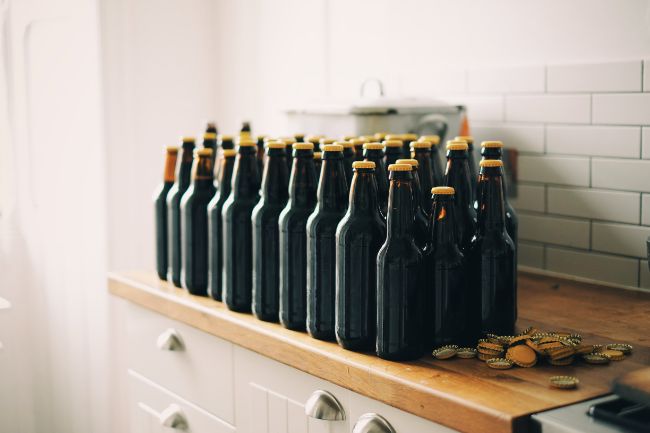
9. Bottle.
Beer must be packaged in capped beer bottles, swing-top bottles, or plastic bottles made to withstand carbonation.
Your brew will keep developing carbonation over time.
Pour the beer into bottles with the auto-siphon, allowing about 1.5 inches (3 cm) of headspace at the top.
Put a cap on your beer and keep it in a cold, dark place for two to four weeks.
After all that wait time, test if it’s ready by cracking open one bottle.
Try to consume your homebrew in three to four months.
Please note that the beer is shelf-stable, but it doesn’t have any preservatives.
Final Thoughts
There you have it!
That’s basically what it takes to make beer at home.
A homebrewing kit is convenient, but nothing stops you from sourcing all the materials.
You can save some money in the process, and you’ll likely learn something or two as you go through the brewing.
Please note that brewing can be a messy process.
So, maintaining cleanliness keeps everything organized and helps preserve and improve the quality of your homebrew.
Cheers!